I will show you how to make an Element Mark Report.
1. First I will make a template in Excel.
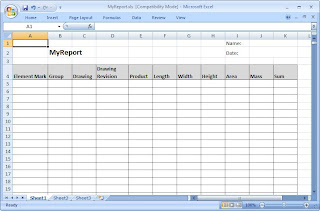
Line 1-4 is the 'Header Section', here I would like to have name in cell (10,1) and date in cell (10,2). Line 5- is the 'Selection Section'. I would like to have 11 columns in the report with the same data as the 'Element Mark' table in the 'Project Manager' (PM).
The template should be saved in the templates_reports folder e.g. '...\impact_1101\common\1100\1100\templates_reports\MyReport.xls'
2. Now I have to add and configure the new report in 'Administrative Tool' (AT)
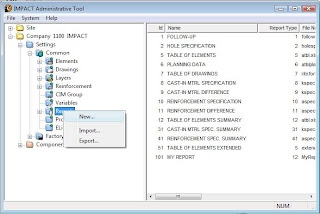
Right click on the Reports node and select new.

Write Report Id and Name. Report Type should be 12.
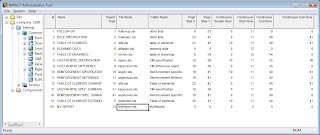
File name should be the template file name e.g MyReport.xls. The continuous section starts at row 5 and has no end row (0). I have chosen to have no max page size (0,0) and no continuous header (0) or footer (0).
Now I have to tell AT where to put data in the Excel file.

Add the two fields to the Header Section
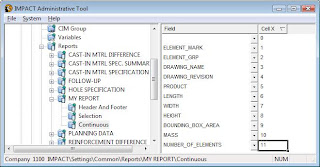
Add columns to the Continuous Section.
The configuration is done!
3. Update the Report in PM
All report templates are copied to the project once when the project is created.
If the report is new or changed I have to update my project template.
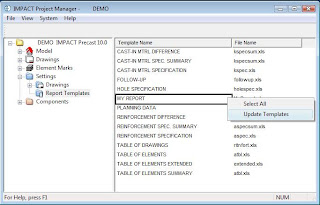
Right click and select 'Update Template'.
4. Generate the report in PM
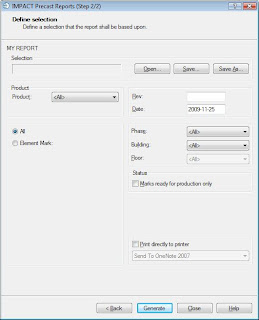
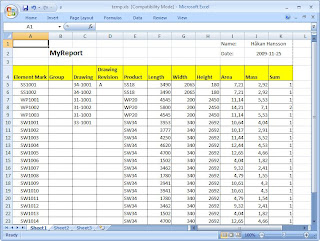
Good Luck!